(Hands-On) Hyperparameter Tuning
The following video is an excerpt from a live session dedicated to reviewing the Hyperparameter Tuning that finely tunes the solution for this particular Kaggle Competition example.
After watching this video you will deploy a notebook server where you will use a Jupyter notebook to hyperparameter tune the model for the Covid-19 mRNA Vaccine Degradation Prediction.
Now that you have run a single pipeline, it’s time to optimize your model using hyperparameter tuning. We are going to use Katib, Kubeflow’s official hyperparameter tuner, to perform this job. Kale will orchestrate Katib and KFP experiments so that every Katib trial is a pipeline run in Kubeflow Pipelines.
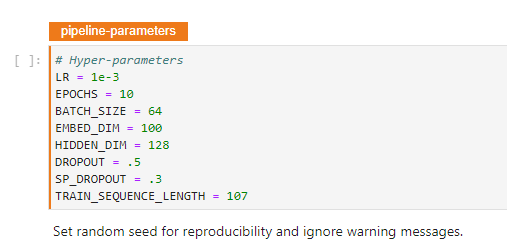
1. Find pipeline-parameters cell
If you go back to your notebook, you will find the following cell at the top, declaring hyperparameters:
2. Create a new cell
We also need to declare the metric to optimize our model against and we want Kale to create a pipeline which outputs KFP native metrics. Here, we are going to use the validation_loss as a metric. To do this, go to the end of the notebook, and create a new cell.

Type:
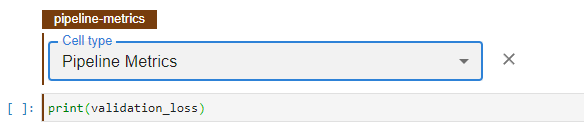
print(validation_loss)
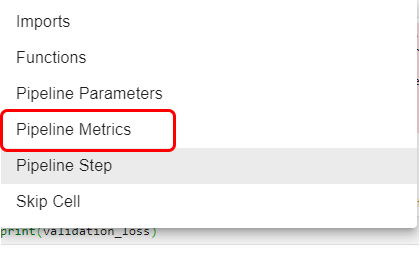
3. Tag the cell as Pipeline Metrics
Click on the pencil icon to edit this cell and tag it as Pipeline Metrics:
Now, you should have a cell like the following:
That’s all you need. Now, every time you use Kale to convert this notebook, the resulting pipeline will produce a KFP metric with the value of the validation_loss.
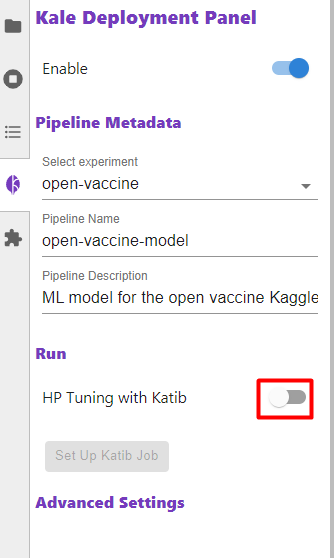
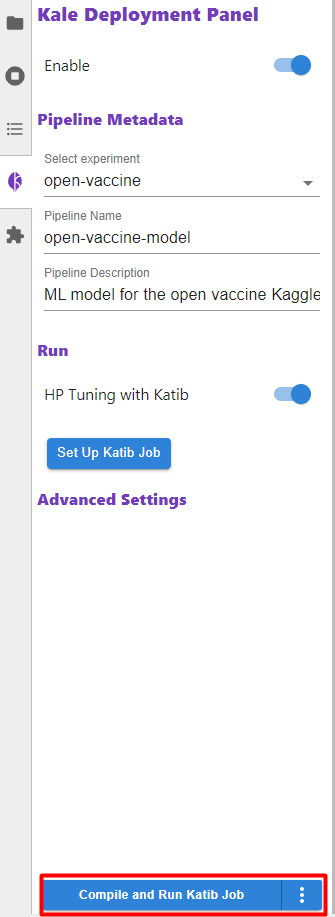
4. Enable Katib
Now, let’s enable Katib to run hyperparameter tuning by clicking the toggle on the left pane:
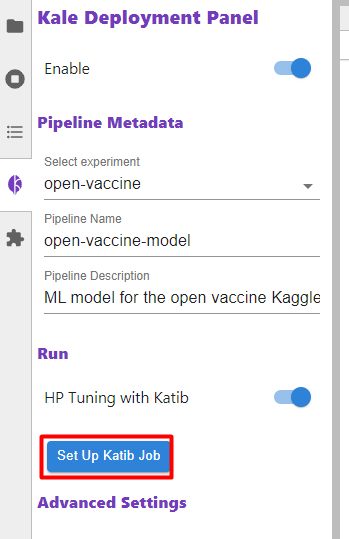
5. Configure Katib
Click on Set up Katib Job to configure Katib:
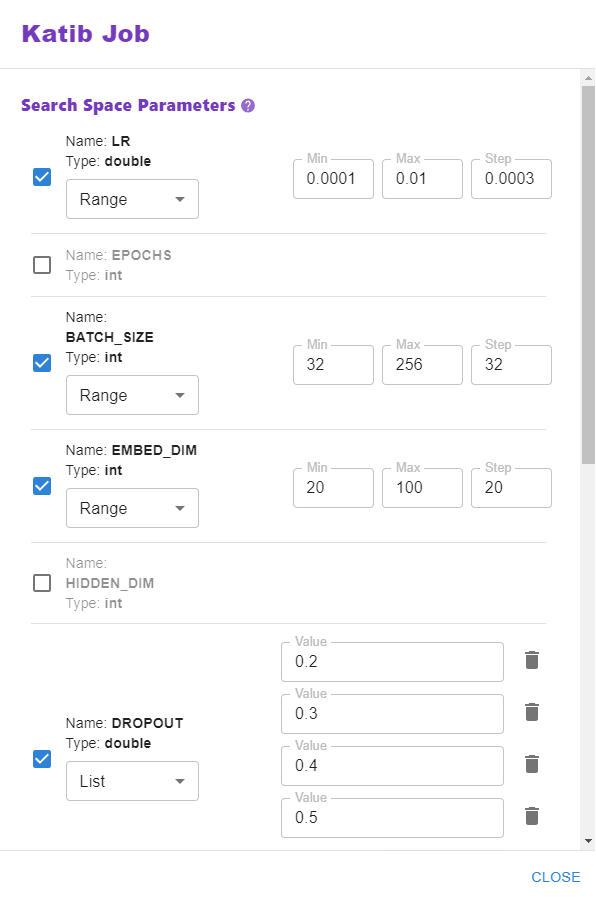
6. Configure search space parameters
Note that Kale is smart enough to auto-detect the HP tuning parameters and their type from the notebook, since we defined a pipeline-parameters cell. Configure the search space for each parameter:
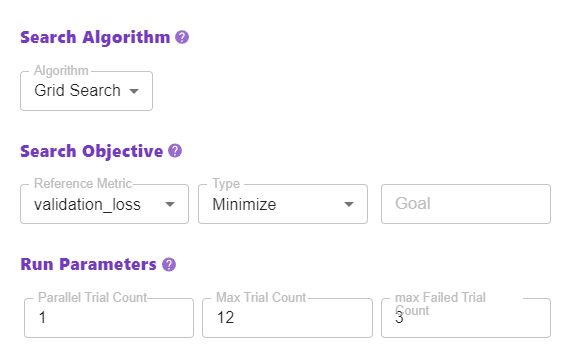
7. Define search algorithm, objective, and run parameters
Also, define a search algorithm, a search objective, and run parameters. Everything is prefilled, so you don’t need to change anything.
8. Compile and run Katib job
Close this dialog and then click on the Compile and Run Katib Job button:
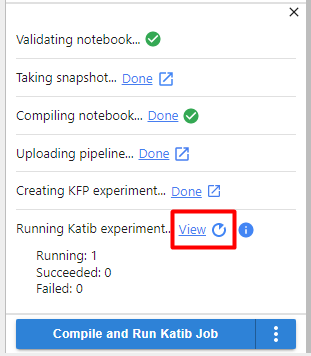
9. Watch the progress
Watch the progress of the Katib experiment:

10. View Katib experiment
Click on View to see the Katib experiment:
11. View the Katib UI
This is the Katib UI and here you can see the progress of the experiment you just started:

This brand-new UI has been built for Katib by Arrikto from scratch. We have made various improvements to showcase more detailed information about the experiment.
12. View the graph
When the Katib experiment is completed, you should see a graph like the following:
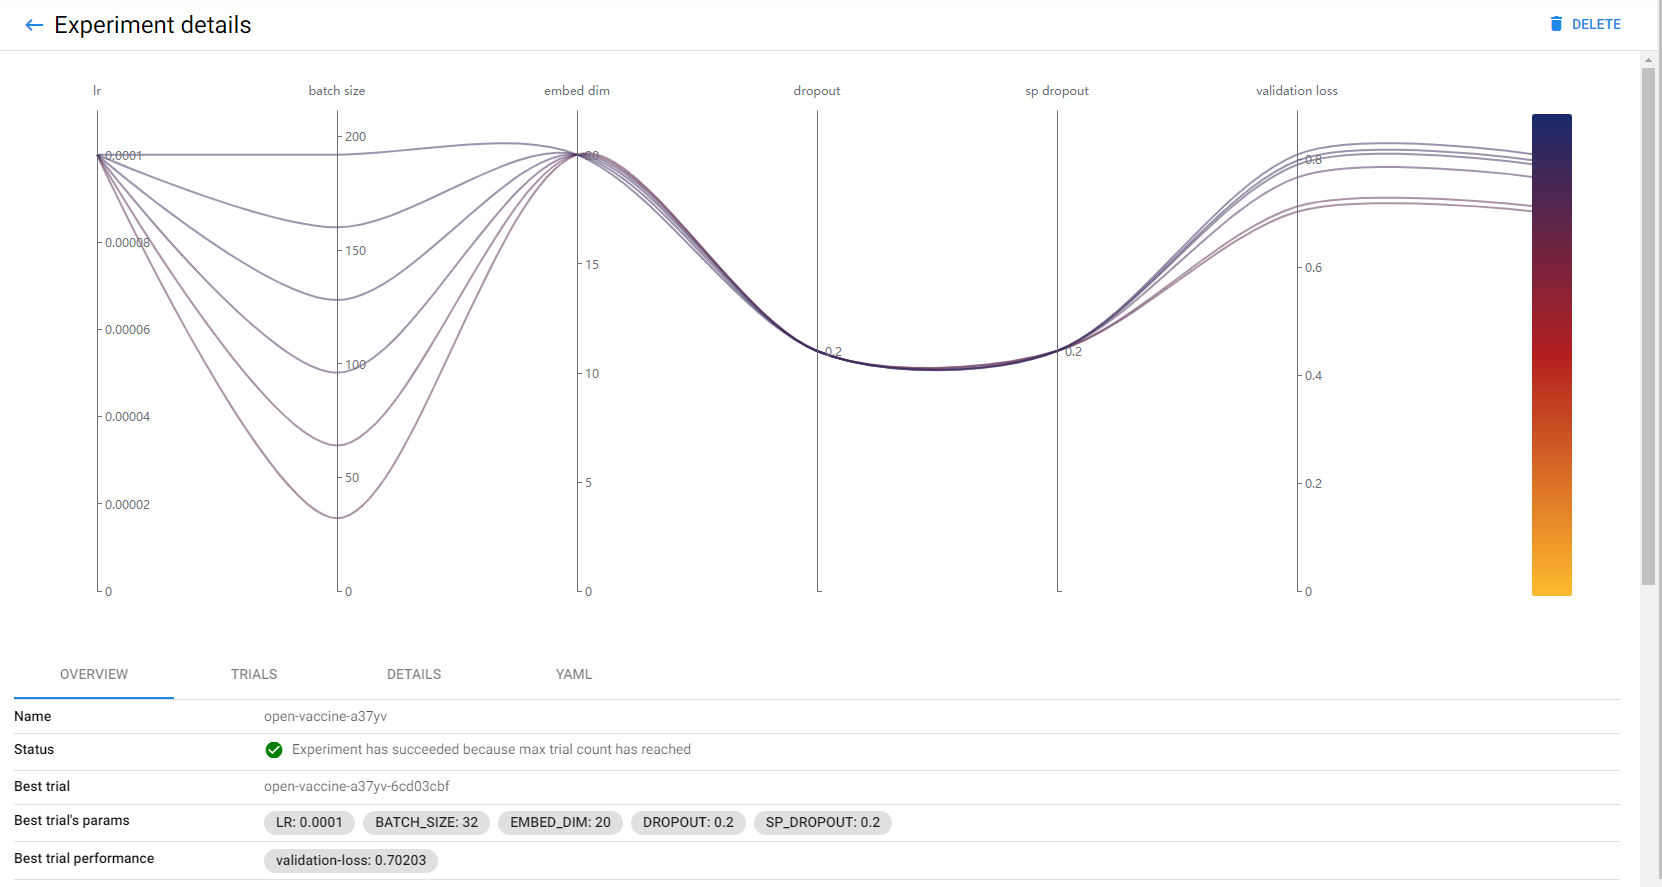
Note that the plot is interactive so that you can easily explore how the various configurations affected the pipeline metrics.
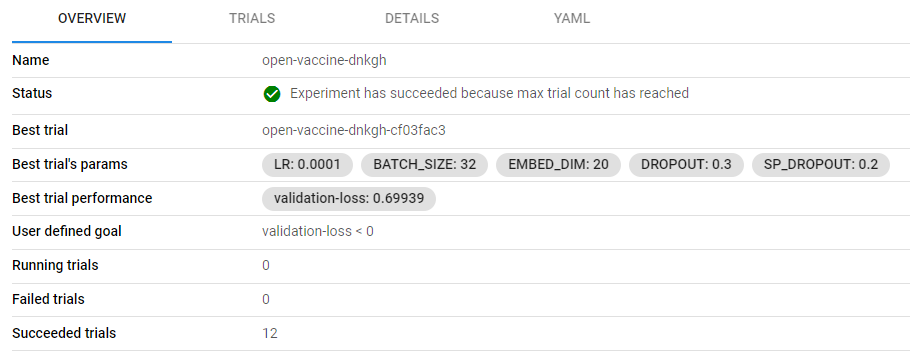
13. View the best trial configuration
Moreover, you can see the configuration of the best trial and its performance:
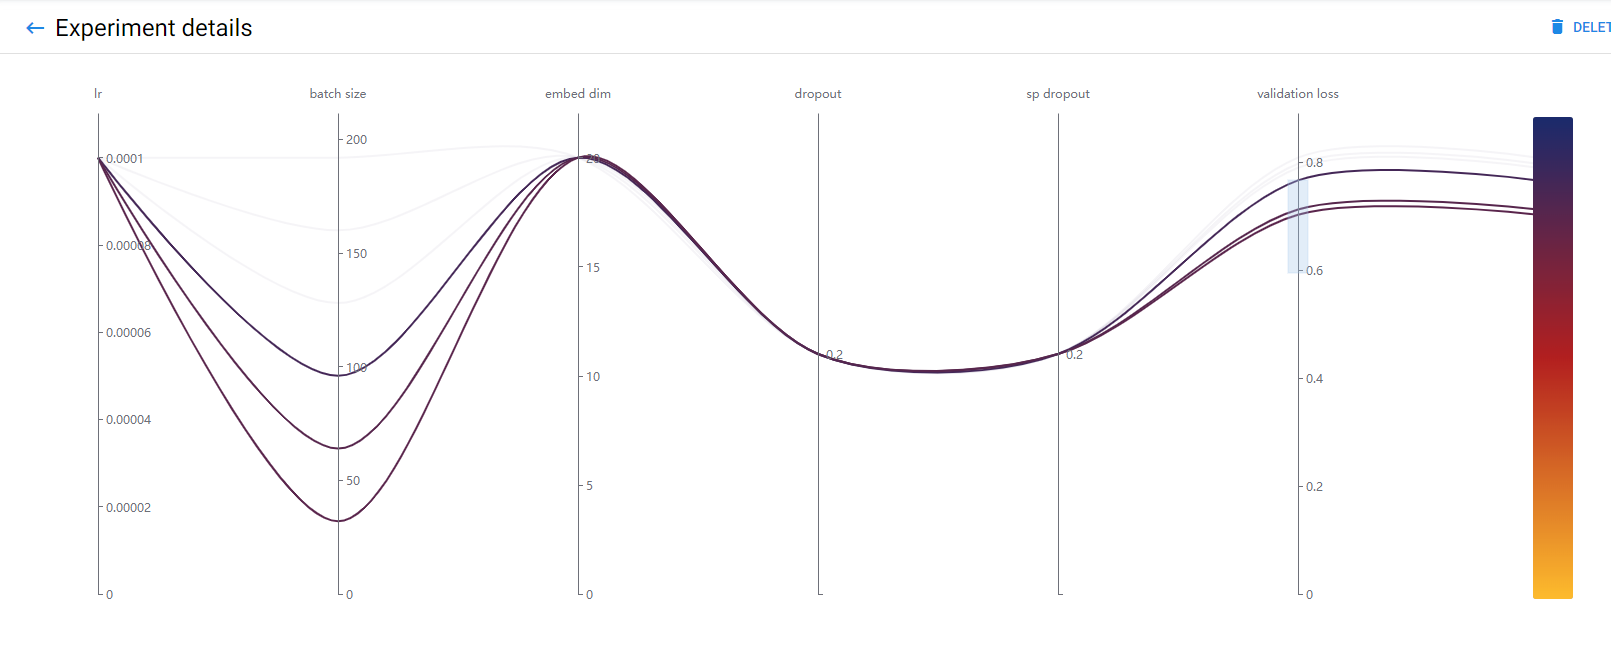
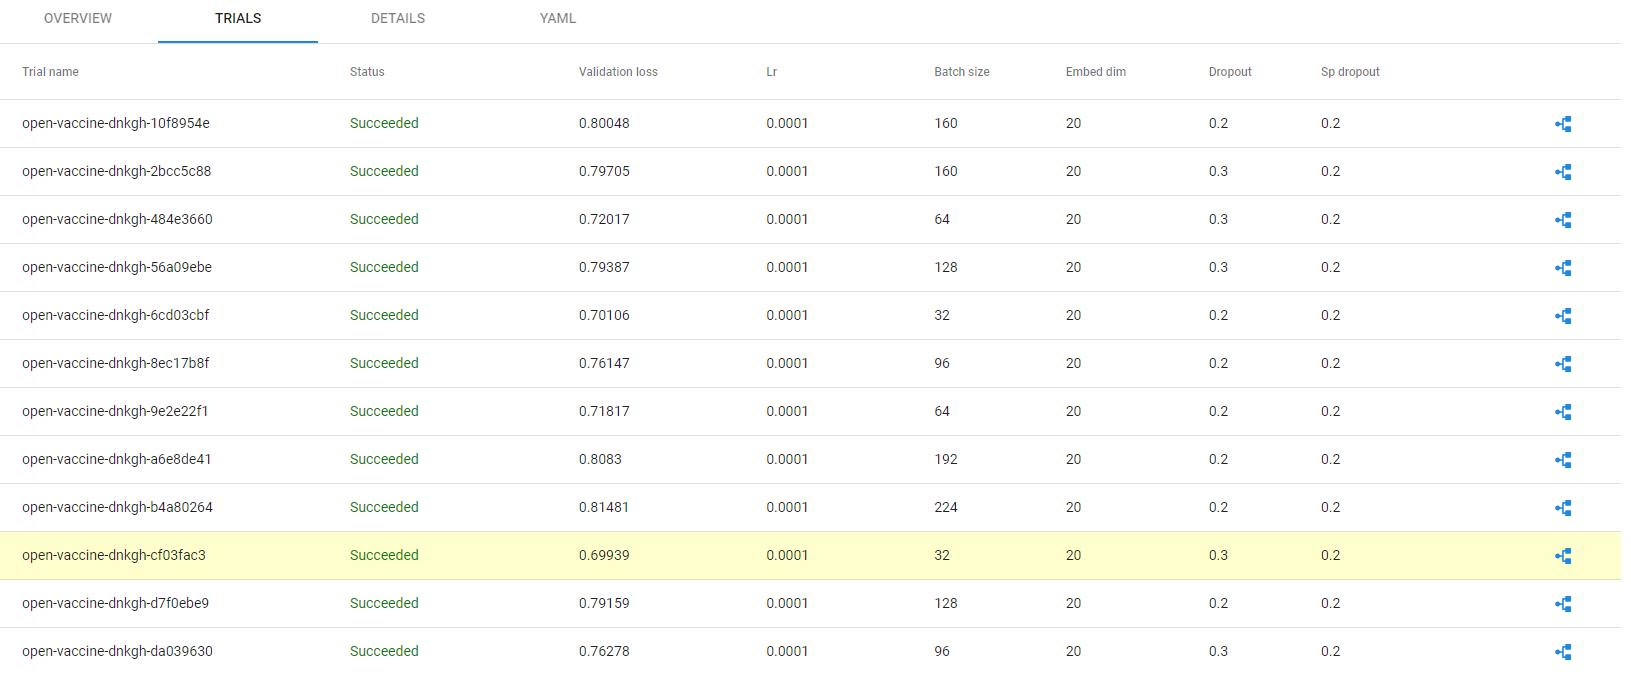
14. Go to TRIALS tab
On the TRIALS tab you will find a list with all the trials. Hover over one of them and see how the selected trial is highlighted on the plot:
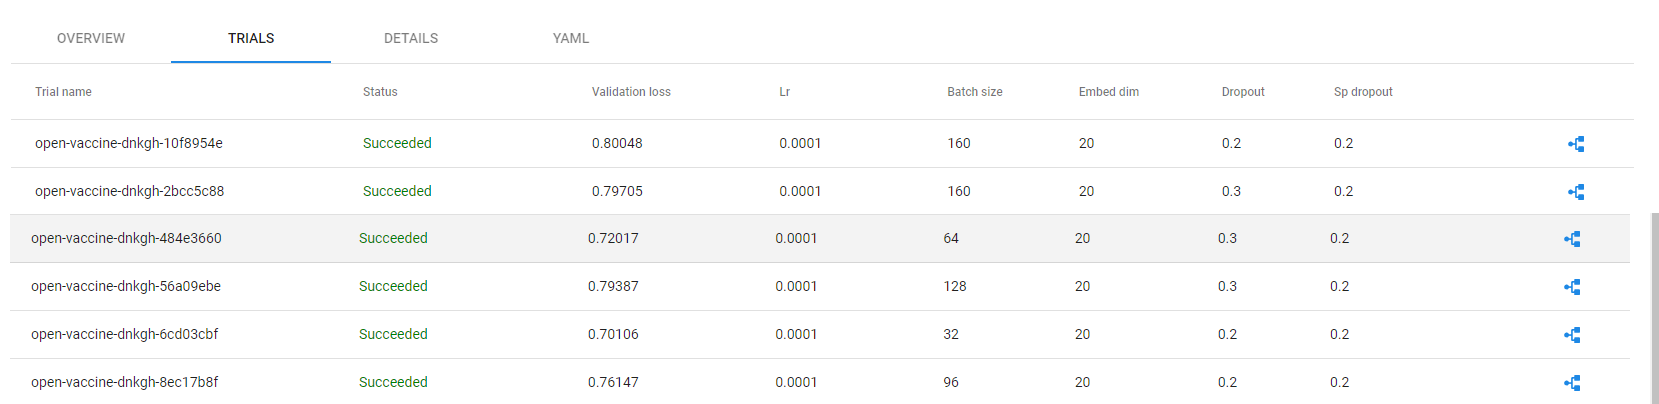
The best Katib trial is highlighted in this list:
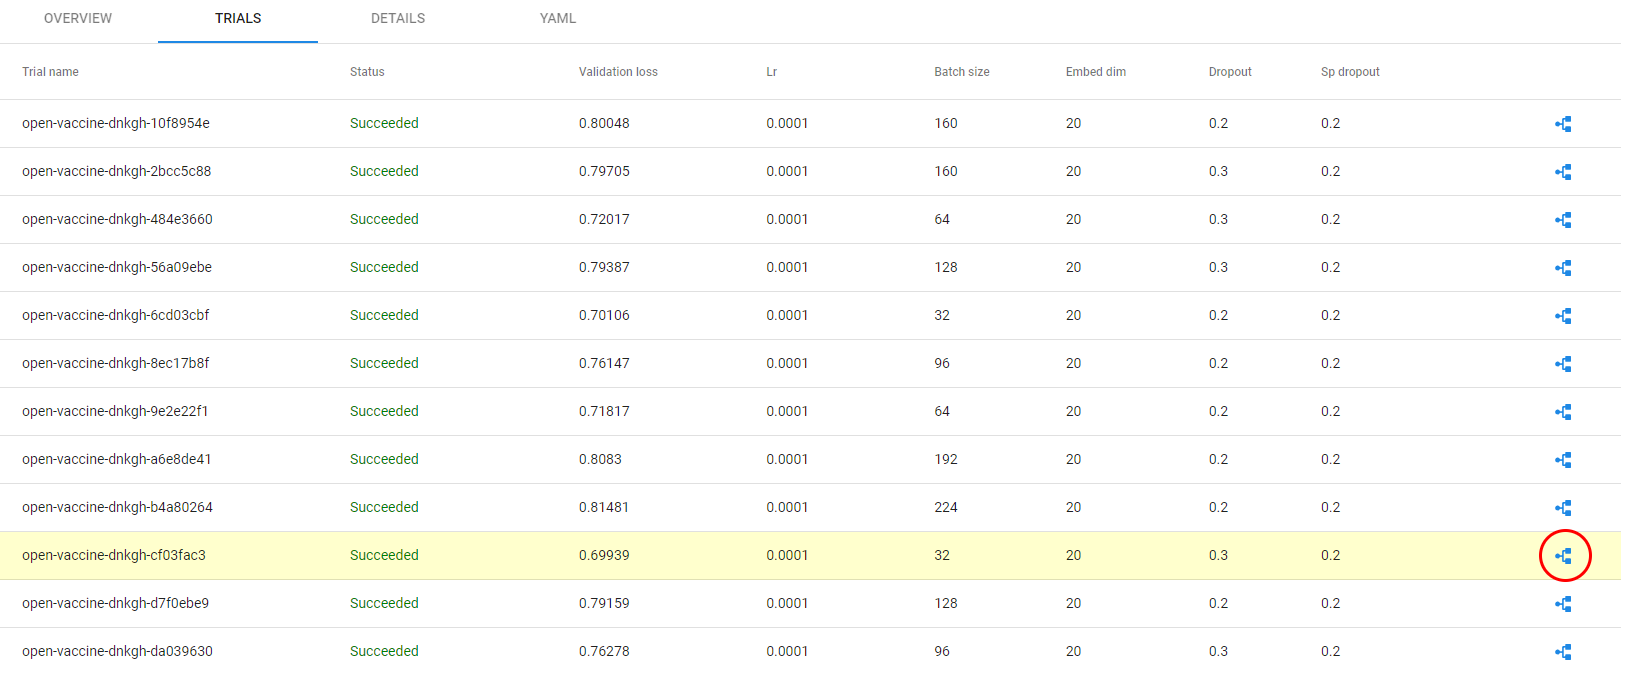
15. Go to best trial pipeline run
Click on the pipeline icon to the right and you will be redirected to the corresponding Kubeflow pipeline run:
Here is the run:
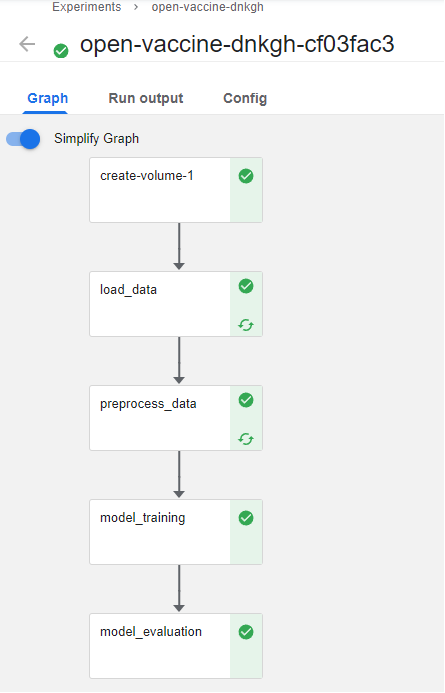
Note that some steps have a recycle icon. This means that these steps were cached. When running hyperparameter tuning, you don’t need to rerun all the steps, but only those that depend on hyperparameters. To take care of caching, we have implemented a mechanism that relies on the snapshotting capabilities of Rok.
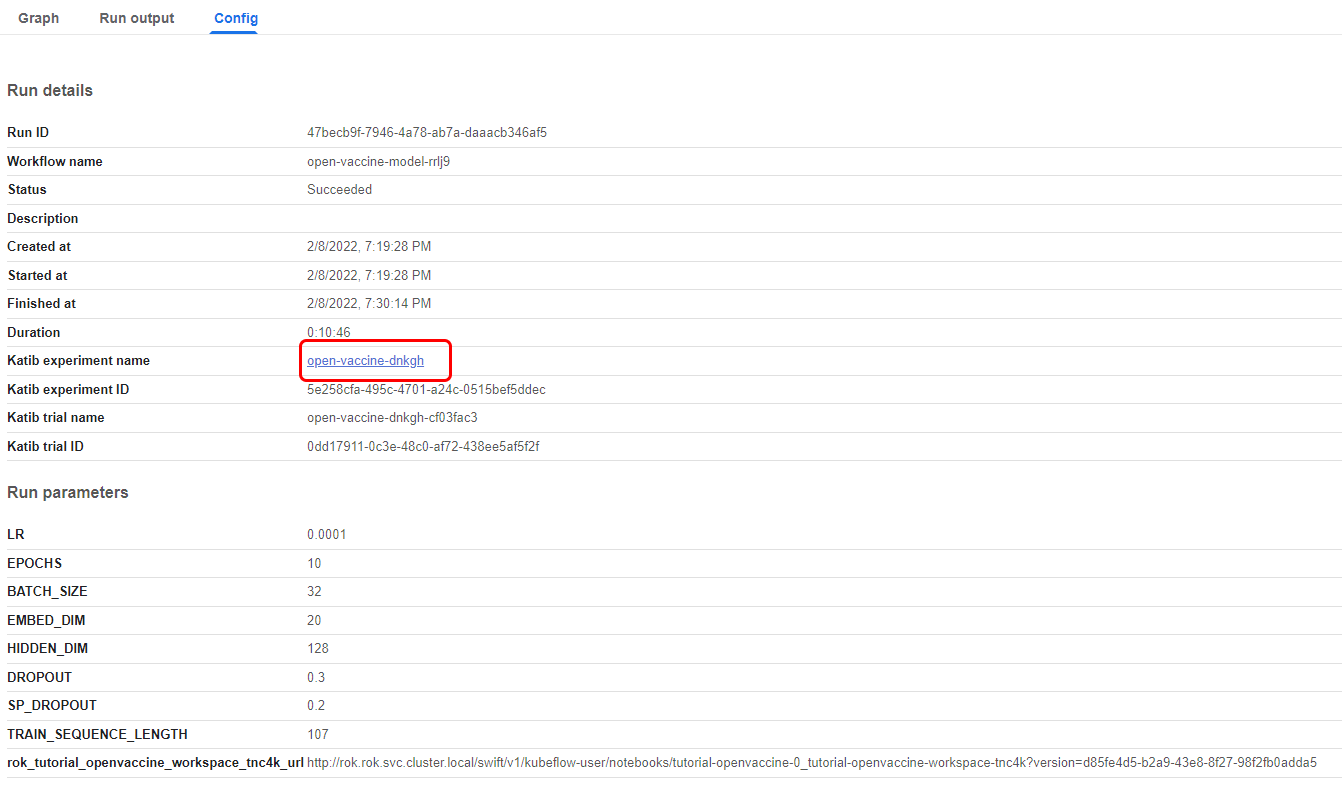
16. Go to Config tab
In the Config tab, you will find more details about the run. You will also find a link back to the original Katib experiment. This cross linking between Katib and KFP is possible, because this workflow was created by Kale, which orchestrates all the various Kubeflow components, and adds the necessary annotations and semantics to make the components communicate between them.